Friday, September 30, 2011

Foodie Friday: Homemade Bread Pudding


I have had this recipe for several years now and I am always so excited for the holidays to roll around because that means I get to bake it! Even when I was 9 months pregnant I stood on swollen feet so I could have my favorite dessert, bread pudding! I hope you enjoy it!

This recipe makes 6 large servings. I would suggest using some kind if italian or french bread loaf. If you use day old, slightly stale bread, that is the best. If the bread is too fresh it will end up too soggy.

For the pudding, you will need:
  • 3 cups bread cubes
  • 4 cups hot milk
  • 4 eggs, lightly beaten
  • 3/4 cup white sugar
  • 1 tbsp butter
  • 1/2 tbsp cinnamon
  • 1 tsp pure vanilla extract
  • 1/2 tsp salt
  1. Preheat oven to 350 degrees Fahrenheit
  2. Butter 8x8 (or equivalent) baking dish
  3. Soak bread cubes in hot milk on stove for a total of five minutes. While soaking stir in sugar, butter, salt, eggs, and cinnamon
  4. Remove bread mixture from heat and pour into buttered baking dish
  5. Place baking dish with mixture into larger baking dish and fill halfway with hot water. This will prevent the edges of the bread pudding from burning
  6. Bake for 60-70 minutes
  7. After baked, remove from oven, and place bread pudding on wire rack to cool
  8. While cooling, make topping (see below)


For the topping, you will need:
  • 1 cup white sugar
  • 1/2 cup butter
  • 1/2 cup heavy cream
  • 1 teaspoon vanilla extract
  1. Combine sugar, butter, heavy cream, and vanilla extract in a small saucepan and bring to a boil
  2. Once topping boils, lower heat and stir for 3 minutes
  3. Spoon over individual servings
  4. Garnish with powdered sugar and berries
Wednesday, September 28, 2011

My Wedding: Centerpieces

Here is a vast collection of centerpiece ideas that I have collected. Looove them all. We are doing long tables and round tables. Flowers will most likely be on the round tables and the long tables will have candle arrangements, stretched out down a purple table runner.


If I use tulips, they would be white, like this!


I love these. They look like candlestick holders, but they hold large tealights. Fantastic! The height without the awkward visual barrier between the people. Blomster at IKEA.

Tuesday, September 27, 2011

Craft Tuesday: Make your own notepads!


Let me give a brief history of this project: I followed the instructions I found on a collection of different blogs, but the adhesive they said to use (padding compound/adhesive) didn't work! I don't know if it was the specific one I bought, or if I didn't use it correctly, but I was quite dismayed. And determined. I decided that I had to try something different. SO I had to experiment. How about Mod Podge? Would that work? Why yes, yes it does! =D

This homemade note/memo pad is a great project to do with leftover scrapbooking paper that you'd normal toss out,  cardstock scraps, paper that you print out (to make personalized notepads), or paper you buy specifically for this (you know those paper stacks you find in the scrapbooking section? Hooray for pre-coordinated paper). I have lots of scrapbooking paper scraps and full pages I have had for years that have never been used and were getting ready to be thrown out, so I decided to use those. You don't need much for this project! Just a little time and some color coordination!

For this project, you will need:
  • Paper
  • Craft paper cutter (or scissors and a ruler, but I suggest something like the Cutterbee, pictured, or Fiskars craft paper cutter)
  • Drop cloth for use when applying adhesive
  • Mod Podge (not pictured, that's a picture of the first adhesive I used, which didn't work)
  • Binder clips (not pictured)

Please read through the whole set of instructions before beginning!
First I went through all of my papers and divided them into a couple of piles of papers that would look good in a notepad together. I decided to go with the pink/red and blue paper combination.


Next, using my handy-dandy paper cutter (SUCH a good investment, especially since I scrapbook) I trimmed off rough edges and any tears and cut the paper into strips that were 3.5" wide (pictured above). After I did that I had lots of different lengths, since it was scrap paper. From this point on there is not too much direction, because it gets creative. I picked the first paper, making it the bottom piece, and cut it to 8.5" long (the average magnetic notepad is 3.5x8.5"). I then continued to pick papers and trim them down, making each piece 1/16" smaller than the one it stacked on top of. Make sure you save your scraps you trim off of the 3.5" because you will use them later! Of course you can make all of your paper pieces the same size! It's just a fun look I wanted to try. It takes a while to cut them all and stack them, but the effect is really great in the end.


Now, if you are strategic with it and have enough paper, you could (theoretically) use the small scraps from the end of the strips (pictured above) and get your notepad so that the bottom piece is 3.5x8.5" and the top piece is 3.5x3.5" Of course, I didn't have enough paper of the set I chose so I used the small pieces to make a separate small stack. I only had to trim up these pieces a little bit.


After all of your stacks are lined up, tap the end you want to the top (where the adhesive is going) and place your binder clips about 1/4" away from the top. Use a foam brush to apply Mod Podge (I used two moderate coats, drying about 15 minutes in between each) and allow to dry COMPLETELY before removing the binder clips. Ta-Dah!

Other great things to use this for:
  • Trim your pieces to 5x7" and create a notepad of ready to use picture backdrops for scrapbooking or frames.
  • Print out blank recipe cards and make into pads and give as gifts! Add a little extra by putting one of YOUR favorite recipes on the front card.
  • Make your own day-by-day (or week-by-week) calendar, personalizing with YOUR birthdays, cute pictures, etc. Usually these measure about 5.5x8"
  • Buy some chip board and sticky magnetic strips, put the chip board on your notepad and put your magnet on the back! Now you can hang your pad on your refrigerator!

Sunday, September 25, 2011

Inspiration Sunday: Paint Chips

There are so many things you can do with paint chips. Also, when you consider that paint chips are free, it makes the idea of paint chip projects THAT much more appealing. I have collected paint chip project ideas throughout the past couple of months for various reasons and seasons... here they are! If you have any good ones, leave the link in the comments! :)


Use different shapes for different seasons! Blue & Red stars for July 4th, Red & green for Christmas, etc

Friday, September 23, 2011

Foodie Friday: Easy Mushroom Cream Sauce


This is a super easy, super quick sauce that you can use over pasta (egg noodles are my favorite), rice, steak, or a chicken breast. It is delicious!

You will need:
  • 1 can of Cream of Mushroom soup
  • 2 tablespoons butter
  • 2 tablespoons sour cream
  • Sliced mushrooms to taste (fresh are best)
  • 2-3 pinches of tarragon leaves
  • ½ teaspoon Worcestshire sauce

1. In a medium frying pan melt the butter and cover bottom of pan
2. Turn heat to medium
3. Add full can of Cream of Mushroom soup and stir
4. Pour ½ can of water to pan
5. Add tarragon and worcestshire sauce and mix
6. Add washed mushroom slices and stir
7. Allow to cook at medium for 3-4 minutes
8. Turn heat on low until pasta, rice, chicken, etc is ready
9. Turn heat off and mix in sour cream
10. Serve immediately

Wednesday, September 21, 2011

My Wedding: Location! Location! Location!

Picture from FriscoHeritage.org

Not too far from me, and right down the street from my fiance's parents' house is a great historic district, with reconstructions of old buildings from the area. The Heritage Center is pretty adorable and it is the location of my fiance and my wedding!

While this isn't exactly a craft or anything I am doing for the wedding, I had to share it with you so that in the future when I do post things I am doing for the wedding, you have a backdrop you can picture it on. Make sense?

Okay. To start, the bridal party is getting ready in this beautiful "old" house next to the church. Here are some pictures:

Picture from FriscoHeritage.org
I am in love with that chair!

After we all get ready in this gorgeous house filled with beautiful antique pieces, we will move next door, into the (reconstruction of the) old Baptist Church, with the original pews from 100-ish years ago. It's pretty stunning. Tin ceiling, two aisles, arched windows, wall sconces, and stained glass. Just breathtaking really.

Picture from FriscoHeritage.org


Lastly, after our vows are said, we will be celebrating in the old train depot. Sounds classy right? Well, it's pretty cool. It's got a really casual feel and I cannot wait to dress it up with candles, flowers, and some soft lighting. It will be gorgeous! I just know it!
Picture from DallasNews.com

The middle picture is the entry way (door to the left) from the reception space (the bottom picture). It has beadboarding all around the whole building, except for the reception space, which is little more raw wood. It is a wonderful room and I am very excited!

Okay. So now you've seen it. Now maybe you can keep up with what I'm doing and maybe get inspired for your own wedding planning, whether it's in the works or not. :)

Tuesday, September 20, 2011

Craft Tuesday: Paper Towel Roll Upcylcing!

I use a lot of paper towels. Probably too many. I have been trying to cut back and use more dish towels, but sometimes it's just easier to use something disposable. So what to do with all these paper towel rolls? Hmm. How about I make some wall art!

I have seen it done before with toilet paper rolls, which are exactly the same material (and diameter), but the rolls are different lengths. Paper towel rolls are 11" long, while the toilet paper rolls are about 4.25" long. So, if you are cutting your rolls 1" thick, then that makes it a bit tougher, doesn't it? You end up wasting that little bit of roll... well, I suppose you aren't wasting it (it was trash previously), but you are making an unnecessary cut!

I made mine to hang in my bathroom, which is kind of my low-budget room. But once you get a glossy coat of spray paint on this bad boy, you can hang it anywhere!

For this project, you will need:
  • 6 paper towel rolls (they're not all pictured. I used about 60 pieces, with 11 pieces per roll, I had some left over)
  • Hot glue gun (a very strong crafting glue will work too)
  • Ruler
  • Scissors
  • Pen/Pencil
  • Spray paint (not pictured)


First, flatten your rolls. I dragged the ruler across the creases to make them neat and crisp. Mark off every inch on each side of the paper towel rolls, then connect the lines, creating 1" sections down the roll. Cut at each line.

This is where you can get creative. Play with what you want to do. Here are a couple of different designs I played with. I really like the random look. Just spread them out and then group them back together. You can adjust to make certain pieces do something specific, and then have random around it too.

Don't be afraid to cut the roll slices to different shapes and sizes to give it a layered look. The flower-like design that has the rolls cut in half looks really good. Imagine if you continued to add those halves. It would look like a rich, layered flower! Make sure to think about what colors you want. Do you want your whole piece to be one color? if so, you can wait until after you glue it all together to spray paint it. If you want individual pieces to be different colors (for example, if you are doing a grouping of four sets of four like in the last picture, maybe you want one of the sets of four to be a different color, whether it be the corner set or that center set) then you will need to spray paint the pieces before gluing them together.

After you decide on a design and how you are painting it, execute accordingly. If you are painting first, make sure to wait a full 24 hours before gluing. If you are gluing and then painting, make sure the glue is fully dry (which is pretty quick with hot glue) before painting.

It has been a busy, rainy week for me, so I have not had a chance to paint mine yet. As soon as I do I will post pictures of the finished project! Get excited!

Sunday, September 18, 2011

Inspiration Sunday: Books, books, books

My life is filled with books. They are my passion. I studied English at university and have loved to write and read (in that order) for as long as I can remember. My mother (and me) loves to tell people that I wrote before I could read; I used to copy my story books letter by letter and have her read back what I had wrote!

I am thinking a lot about decorating with books because I would love to have them in every aspect of my life if I could! So, this week's inspirational subject (and probably several more weeks in the future) is books.

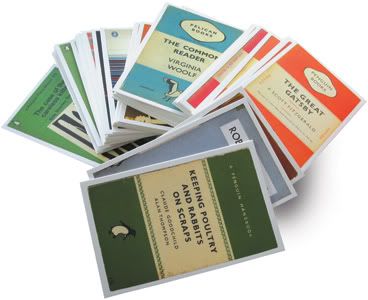
We'll start with something simple. I found these Penguin postcards on Amazon and I have been wanting to buy them and frame a bunch of them, creating a wall of book covers...


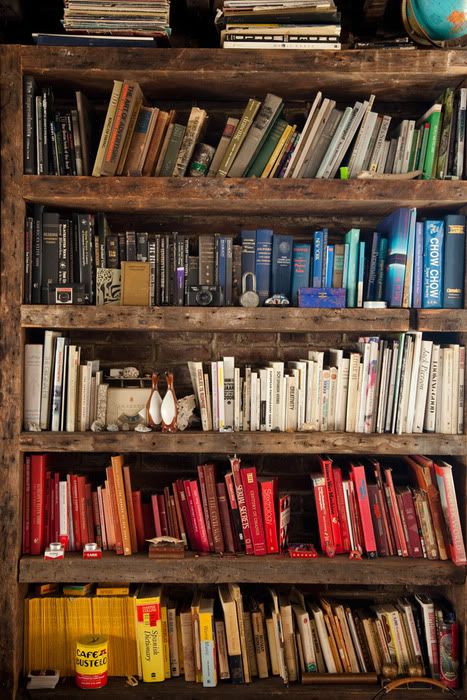
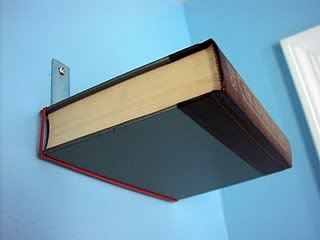
Bookshelves! What a great invention. A single piece of furniture to keep some of the most cherished things in the household. I saw the bookshelf on the left on Pinterest (from Crush Cul de Sac) and loved it... organizing your books (and nick-knacks) by color makes your bookshelf more a piece of art then a shelf! Love! The bookshelf on the right I love because it creates the illusion of floating books! So simple and so effective. How wonderful! This is from Polish the Stars.

Photobucket


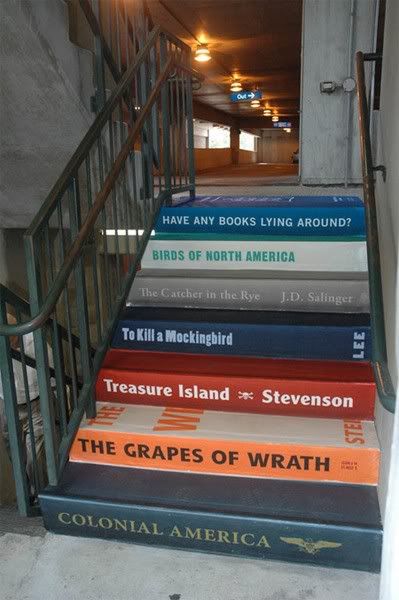
This idea is just so cool. Paint some old stairs to look like stacked books. If I ever have a large study with stairs, or just have some small concrete stairs, I want to do this on a smaller scale (because this looks a little too large).

Photobucket


Visit us again soon!

Friday, September 16, 2011

Foodie Friday: My Tea Party Recipes

Last Wednesday was the first Wedding Wednesday (well, this whole past week has been the first of everything since it's a new blog!), and I shared all about my bridesmaids tea party! I promised the recipes, and here they are! Some of them are approximations since I was just winging it for some of the recipes (thankfully they turned out well).


Photobucket

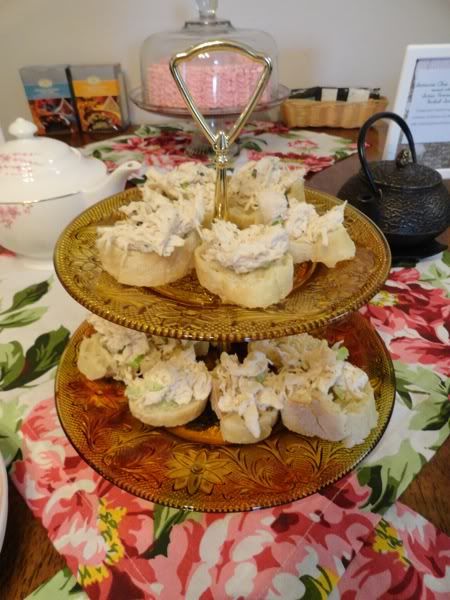
Tarragon Chicken Salad

You will need:
  • 2 chicken breasts
  • 1/2 stalk of celery (you can use less if you want, I really like celery)
  • Approximately 1/2 cup Mayonnaise*
  • 1 spoonful sour cream
  • 1-2 tbsp tarragon*
  • A little bit of honey (less than 1/2 teaspoon)
  • A dash of salt
  • Pepper to taste
    *I just eyeballed it, so I am not sure exactly how much I used
  1. Trim and boil chicken breasts, or use the pre-cooked chicken found near the tuna-fish salad at the store
  2. Allow to cool and do any trimming you may have missed
  3. Using a fork and knife, cut up and flake the chicken into small pieces and put into medium mixing bowl
  4. Pour mayonnaise in and mix with chicken. Use enough to make the chicken stick together, but not so much that the mayonnaise outweighs the chicken
  5. Spoon in sour cream and stir
  6. Pour in honey and stir until incorporated
  7. Chop up celery and mix in
  8. Add tarragon, salt, and pepper and stir
  9. Serve and enjoy! I sliced up a baguette and spooned them onto the slices to serve them


Photobucket
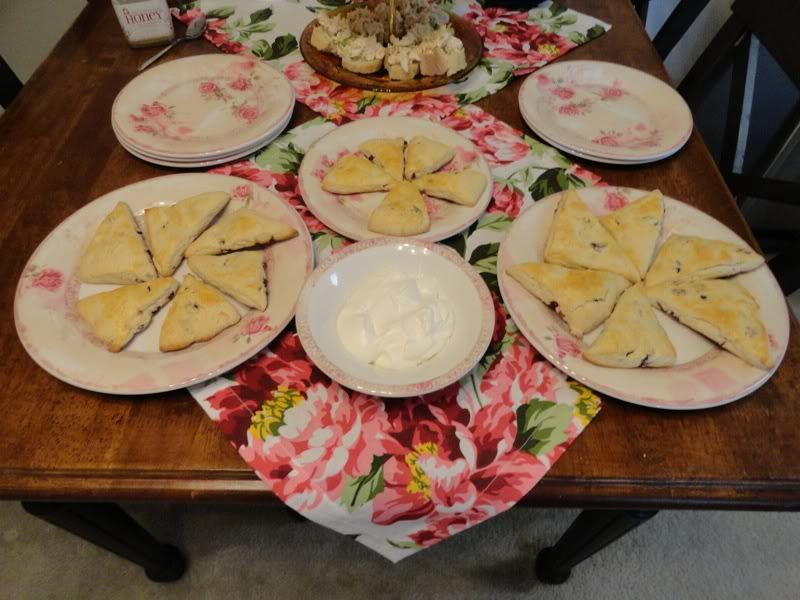
Cranberry-Orange Scones
(originally from Tea Time magazine)

You will need:
  • 2 cups self-rising flour (if you don't have self-rising flour, see Kitchen Basics)
  • 1/2 cup granulated sugar
  • 1/2 teaspoon orange extract
  • 1/2 cup cold butter (softened slightly)
  • 1/2 cup dried cranberries
  • 6 tablespoons milk
  • 2 large eggs
  • 1 teaspoon turbinado sugar (optional
  1. Preheat oven to 425F
  2. In medium bowl, whisk together flour, sugar, and orange extract
  3. Beat in butter until mixture resembles coarse crumbs (do not cream the butter)
  4. Add cranberries and stir. Set mixture aside
  5. In a small bowl, combine milk and 1 beaten egg, stirring well
  6. Add milk and egg mixture to flour mixture, and stir until just combined
  7. Prepare a clean, floured surface. Turn dough out onto and knead gently 8 times
  8. Roll dough out to a 3/4" thickness, as much like a rectangle as possible (this helps cutting the scones)
  9. Using a pastry cutter, or a pizza cutter (my tool of choice), cut into nine small squares, then cutting each square in half diagonally to create the traditional scone triangle
  10. Beat second egg and brush onto scones
  11. Place scones onto baking sheet covered in parchment
  12. Sprinkle scones lightly with turbinado
  13. Bake for 10-12 minutes, until edges are golden brown
Scones Cream
  • You will need:
  • 1 cup cold heavy whipping cream
  • 1/4 cup confectioner's (powdered) sugar
  • 3 tablespoons sour cream
  • 1 teaspoon vanilla extract
  1. In medium bowl, beat cream at high speed until stiff peaks form
  2. Add sugar, sour cream, and vanilla and beat at low speed until well mixed
  3. Refrigerate at least 2 hours before serving
  4. Use within three days


PhotobucketPhotobucket

Butter Cake with Raspberry Filling

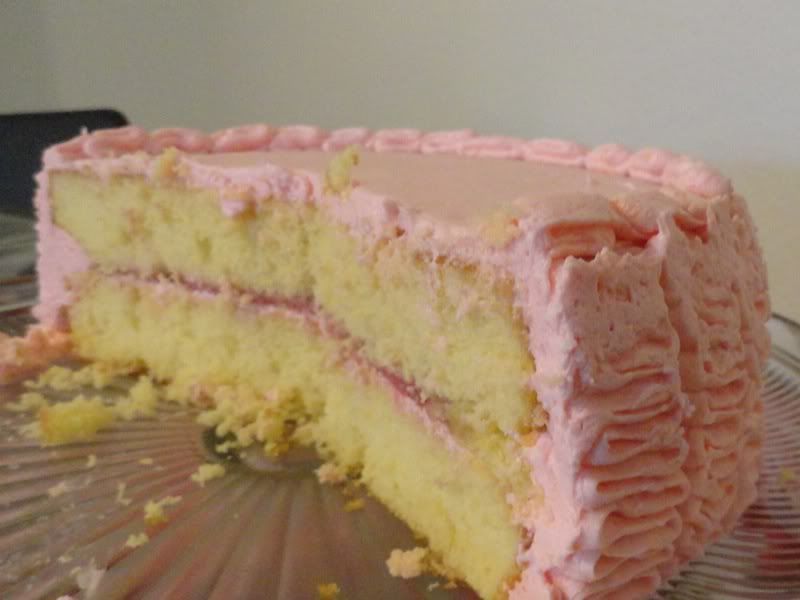
I'm not going to lie, I was so busy doing everything else I used a boxed cake mix (Betty Crocker Classic Butter- or something like that). However, when I do make my own butter cake, I usually use this recipe from MarthaStewart.com. The raspberry filling was made fresh by my wonderful fiance though! This is the recipe he used.

You will need:
  • 1 pkg fresh raspberries
  • ¾ cup granulated sugar
  • 2 tbsp cornstarch
  • 1 tsp raspberry extract (optional)
  1. Wash raspberries
  2. Put raspberries in medium saucepan
  3. Fill pan with water until raspberries are just covered
  4. Heat to a gentle boil
  5. Boil for 5 minutes, stirring occasionally
  6. Using mesh strainer, filter mixture into small saucepan. For a smoother filling, use a mesh coffee filter (non-disposable) after the initial straining
  7. Bring back to a gentle boil
  8. Add sugar to the boiling raspberries, and stir until incorporated
  9. Add raspberry extract
  10. In a separate bowl, mix one cup water and 2 tbsp cornstarch
  11. Add cornstarch mixture to raspberry mixture
  12. Boil gently for 10-15 minutes, stirring occasionally, until it begins to thicken
  13. Remove from heat
  14. Pour into tupperware or bowl and cover. Place into refrigerate until ready for use, at least one hour
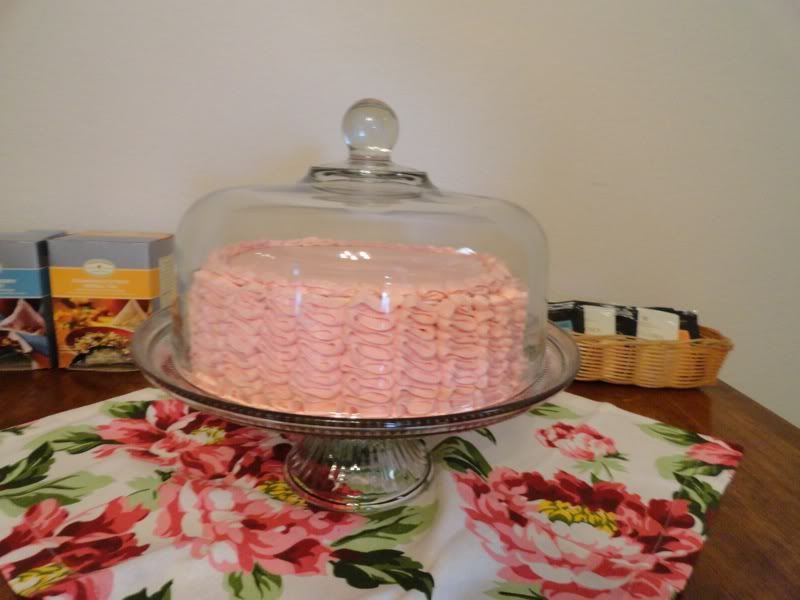
If you are interested in doing the ruffle icing, it is very simple. You just need butter cream icing and the right icing tip! For instructions, I would suggest going to Strawberry Chic.

Thursday, September 15, 2011

Thursdays are for BRAGGING

This week's brag is from Kelly in Houston! She used the hot glue gun technique to decorate an old bulletin board. She based her design off of the design on her bedspread. It turned out wonderfully!

Photobucket Photobucket
Before, and with the hot glue.

Photobucket
All done!

Thank you for submitting your awesome project Kelly!

Keep'em coming! To brag about your project, click on Submit at the top of the page!