Showing posts with label Recipe. Show all posts

Friday, October 21, 2011

Foodie Friday: Chicken Pot Pie...in under an hour


Chicken Pot Pie can take quite a while to make, and it always such a delicious treat, especially on a chilly night. Here is a recipe that will take you about an hour from start to serve, which really is nothing, especially considering 35 minutes of that time is baking time! And my favorite thing about chicken pot pie is that you don't have to have a side dish; your veggies, meat, and bread are all covered.

This recipe makes one large pot pie that serves 3-4. To increase the recipe, I would suggest adding an additional chicken breast and doubling the amount of vegetables. Do not adjust the cream of chicken soup or chicken broth unless you are tripling the recipe.

You will need:
  • 1-2 large chicken breasts
  • 1 can of cream of chicken soup
  • 1-2 packages of 8 crescent rolls (refer to step 8)
  • 1/2 cup chicken broth
  • 1/2 lb frozen mixed vegetables (I used carrots, green beans, peas, and corn)
  • 1/2 tsp Sage
  • Salt & pepper
  •  
    1. Preheat oven to 350 degrees Fahrenheit
    2. Pour chicken broth and frozen vegetables into large skillet
    3. Add sage, salt, and pepper
    4. Heat over medium heat for about 5 minutes, or until vegetables are just tender
    5. While the vegetables are heating, trim and dice your chicken into 1/2" pieces
    6. Once the vegetables are tender, add the chicken and cream of chicken soup to the skillet and cook until heated through, about 10 minutes
    7. I used an 8x8 baking dish. If you are increasing the recipe you will want to use a larger dish. Spray your baking dish with a non-stick cooking spray like Pam
    8. If you are using an 8x8 baking dish, then you can now place half of your crescent roll dough on the bottom of the baking dish.  If you are using a larger dish you can either skip the crescent rolls on the bottom, or open up the second tube of crescent rolls so that one package can be used on the bottom and the other on the top
    9. Pour your mixture in the skillet into your baking dish
    10. Place the rest of the crescent roll dough on top
    11. Cook for 30-35 minutes, or until the dough is golden brown and the inside mixture is  bubbling (if you can see it)

    Friday, October 14, 2011

    Foodie Friday: Biscuits, a Southern Delicacy


    I have found this same recipe several places described as 7-Up Biscuits and Popeye's biscuits. These are great biscuits that taste just like traditional Southern biscuits to eat any time of day, whether it be with scrambled eggs and bacon, or fried chicken and corn on the cob. The best part is how incredibly simple the recipe is!

    This recipe makes 9 rolls. I used an 8x8 baking dish and it fit PERFECTLY. So if you decide to double the batch size or anything, keep that in mind.

    You will need:
    • 2 cups Bisquick
    • 1/2 cup 7-Up
    • 1/2 cup sour cream
    • 1/4 cup (4 tbsp) butter

    1. Preheat the oven to 450 degrees Fahrenheit
    2. Mix together the Bisquick, 7-Up, and sour cream in a mixing bowl
    3. On a clean counter or large cutting board, sprinkle a generous amount of Bisquick
    4. Before you put the dough onto the prepared surface, sprinkle some extra Bisquick on to the dough and put some on your hands. The dough is very soft and very sticky. The extra Bisquick will keep it from sticking to you. Don't be afraid to sprinkle a little bit more onto the dough once you transfer it either
    5. Pat the dough out, keeping in mind the size and shape of the dish you are using to bake the biscuits. I tried to pat mine out to an 8x8 square
    6. Melt your butter and pour it into the bottom of the baking dish
    7. Using a knife (or even a pizza cutter), cut the biscuits (I did 3 rows of 3) and place them into the baking dish
    8. Sprinkle a bit of Bisquick onto the top of the biscuits
    9. Bake for 13 -15 minutes, or until golden brown on top

    Friday, October 7, 2011

    Foodie Friday: The easiest quesadillas you've ever made


    I was walking back and forth from my pantry to my refrigerator trying to figure out what on earth to eat for lunch... I was in desperate need of going to the grocery store so there were very slim pickings. What I threw together turned out to be terrific and is going to be eaten much more frequently in this household, that's for sure. These are without a doubt the easiest quesadillas I have ever made. This recipe makes about 4 servings, depending on how big your tortillas are.

    You will need:
    • Tortillas (I had corn on hand, I bet flour would work even better)
    • Shredded cheddar cheese (or Monterrey Jack)
    • Canned chili (I used Hormel with beans, but any kind with or without beans would be great I'm sure)
    • Butter
    1. Microwave your chili according to the chili label. 
    2. Melt a little bit of butter on a skillet and and add a tortilla. 
    3. Top with a light layer of shredded cheese and let it begin to melt. 
    4. Add the chili and another light layer of cheese. 
    5. Add your top tortilla and wait until the cheese on top has had a chance to melt (which should be fairly quickly since the chili is hot already from microwaving). 
    6. Flip, let the tortilla heat up, and serve.

    I put a dollop of sour cream on top too. If you have some guacamole or pico de gallo, that'd be a great garnish too.

    Hint: If you are really crunched for time, you don't NEED to use a skillet. Since the chili is already hot, you can just layer it and let the hot chili melt the cheese and make the quesadilla stick.

    Happy eating!

    Friday, September 23, 2011

    Foodie Friday: Easy Mushroom Cream Sauce


    This is a super easy, super quick sauce that you can use over pasta (egg noodles are my favorite), rice, steak, or a chicken breast. It is delicious!

    You will need:
    • 1 can of Cream of Mushroom soup
    • 2 tablespoons butter
    • 2 tablespoons sour cream
    • Sliced mushrooms to taste (fresh are best)
    • 2-3 pinches of tarragon leaves
    • ½ teaspoon Worcestshire sauce

    1. In a medium frying pan melt the butter and cover bottom of pan
    2. Turn heat to medium
    3. Add full can of Cream of Mushroom soup and stir
    4. Pour ½ can of water to pan
    5. Add tarragon and worcestshire sauce and mix
    6. Add washed mushroom slices and stir
    7. Allow to cook at medium for 3-4 minutes
    8. Turn heat on low until pasta, rice, chicken, etc is ready
    9. Turn heat off and mix in sour cream
    10. Serve immediately

    Friday, September 9, 2011

    Foodie Friday: Butternut Squash Baked Pasta


    Okay, in my efforts to eat more vegetables without cutting into my pasta eating, I have made this recipe several times. It makes six large servings and the leftovers keep really well! The ONLY thing I don't like about making this is the amount of time it takes to peel and seed the butternut squash. So, if you can find it peeled and chopped already, that will save you lots of time.

    Also, this recipe does have ham in it, but leave it and out you have a delicious vegetarian meal!

    You will need:
    • 1 butternut squash
    • 16 oz (1 box) rotini pasta
    • 1 ¾ cups chicken broth
    • 1 ½ cups milk
    • 1 cup (about 3 oz) freshly grated parmesan cheese
    • ¼ cup plain bread crumbs
    • 4 oz diced pancetta (ham deli meat works too)
    • 3 medium cloves of garlic
    • 2 tbsp parsley
    • 1 tbsp thyme
    • 4 tsp olive oil
    • Ground pepper

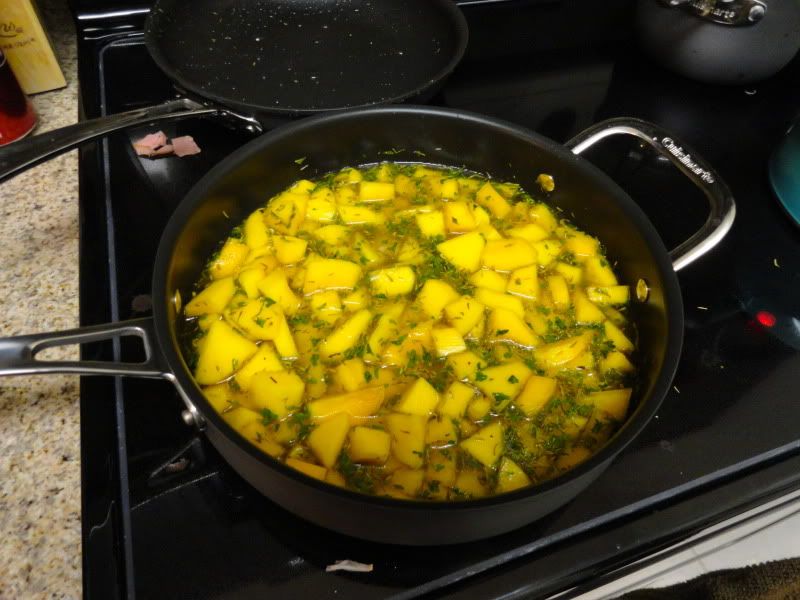
    1.     Peel and seed butternut squash, and dice into ¼ inch pieces
    2.     Preheat oven to 375 degrees Fahrenheit.
    3.     In 12” skillet, cook diced pancetta (or chopped ham slices), stirring occasionally, over medium heat for about 10 minutes or until browned.
    4.     Scoop pancetta into medium bowl and press peeled garlic into the same skillet, adding 2 teaspoons olive oil.
    5.     Add ground pepper to taste.
    6.     Cook garlic for 3-5 minutes and transfer garlic to bowl with pancetta.
    7.     In the same skillet, heat 2 teaspoons olive oil until hot.
    8.     Add diced squash to skillet. Cover and cook for 10 minutes, stirring frequently.
    9.     Now is a good time to begin making the rotini pasta. Once the water begins to boil, add pasta and cook 2 minutes less than indicated on the box. After the pasta is cooked, strain it and return it to the pot.
    10.  In the skillet with butternut squash, add parsley, thyme, and broth. Cover back up and cook for 12 minutes, or until squash is tender.
    11.  Add milk into skillet and stir. Heat through.
    12.  Add squash and pancetta mixtures to pasta as well as ¾ cup grated parmesan and stir until well mixed.
    13.  Spoon pasta into large ceramic baking dish and sprinkle with breadcrumbs and remaining parmesan. Bake 30 minutes, until top is golden. Let cool for 5 minutes and serve.


    This is a recipe that I found on Better Homes & Gardens, and modified quite a bit. If you are interested, here is the original recipe.