
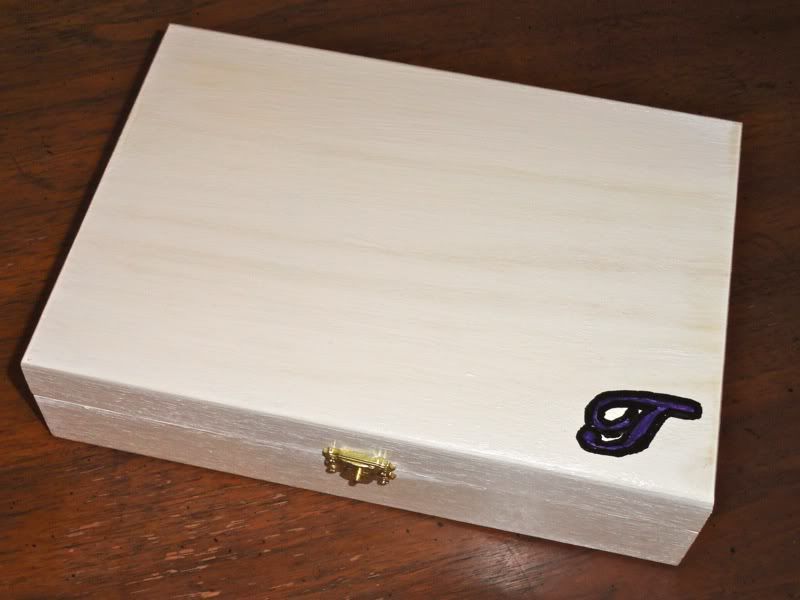
It was a very simple, but time-consuming process. I started with some $7 unfinished wood boxes from a craft store and primed them with FolkArt artist pigment in titanium white. Then I did one coat of ivory. Since the primer coat was with nice, thick paint I only needed to use one coat. If I hadn't wanted any woodgrain to show through I would have done one more coat of the ivory, but I ended up liking the woodgrain a lot, so I left it.
Each girl's box had their first initial painted on the front (hooray for stencils!) Next, I made a stencil out of cardstock of a basic decorative shape. I then traced around it on the inside of each lid, and painted light green on the outside of the stenciled shape. I then penciled in cursive "Be my bridesmaid?" inside the stenciled frame. Next came that handy black paint pen. I traced over the cursive with it- it's a shame my handwriting isn't any better, but I guess that's the charm of homemade things- they are never all matchy-matchy perfect.
I then let everything dry for about 24 hours and did two coats of varnish (you can find the exact kind I used in the store).
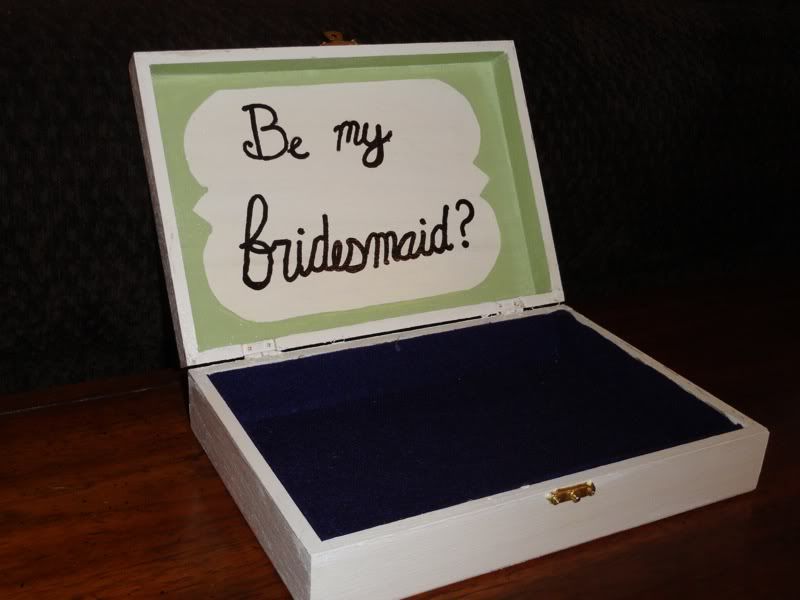
To line the inside of the box I bought some 8 1/2" x 11" sheets of felt at the craft store (I didn't want to spring for the nice stuff on the bolt, and this felt seemed pretty good to me). I was able to use one sheet per box, cutting them up to make a strip for each side and a large rectangle for the bottom. Then, after all the varnish had dried, I was able to brake out my hot glue gun (yaaay!) and glue down the felt. I went back and made sure all the edges were secure after I had glued down all of them.
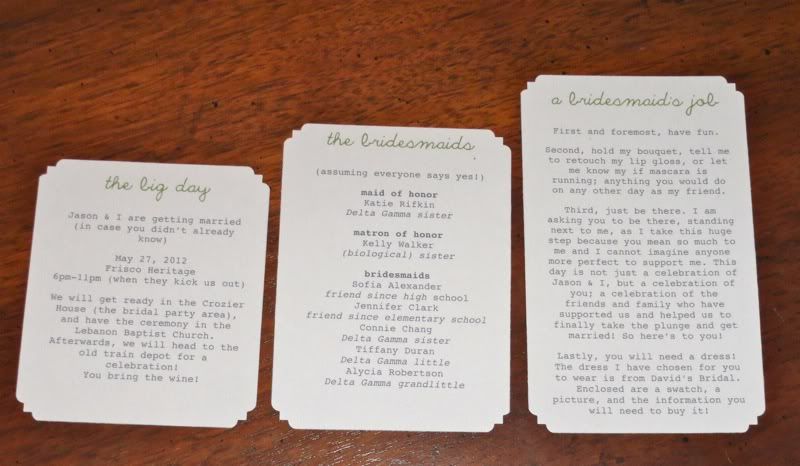
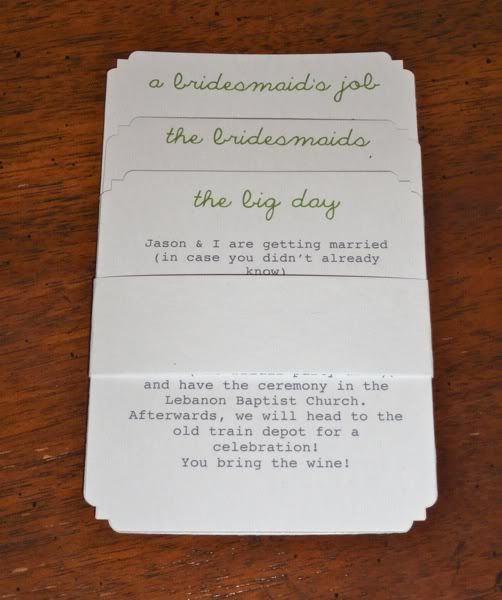
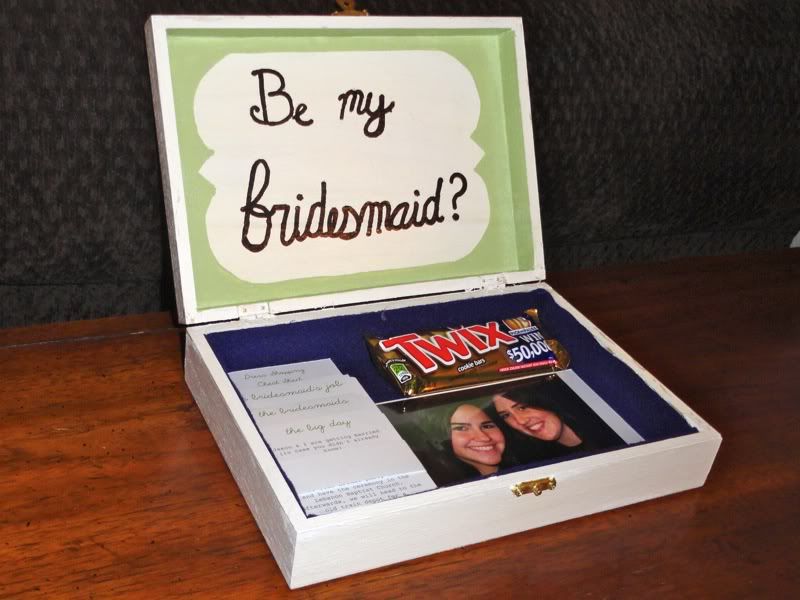
I then typed up some information on to three cards, which got progressively larger. The first one had the date, time, and location of the wedding. The second had a list of all the girls I was asking to be in the bridal party. The third was "A bridesmaid's job" which then went on to say "just be there for me, I love you, you're awesome." I stacked them and wrapped some cardstock around them to hold them together. They looked like this when I was all done:
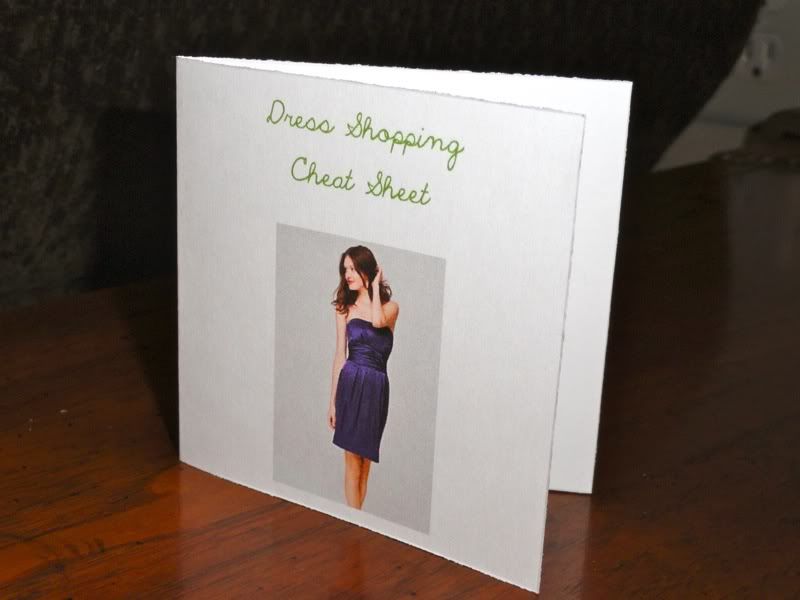
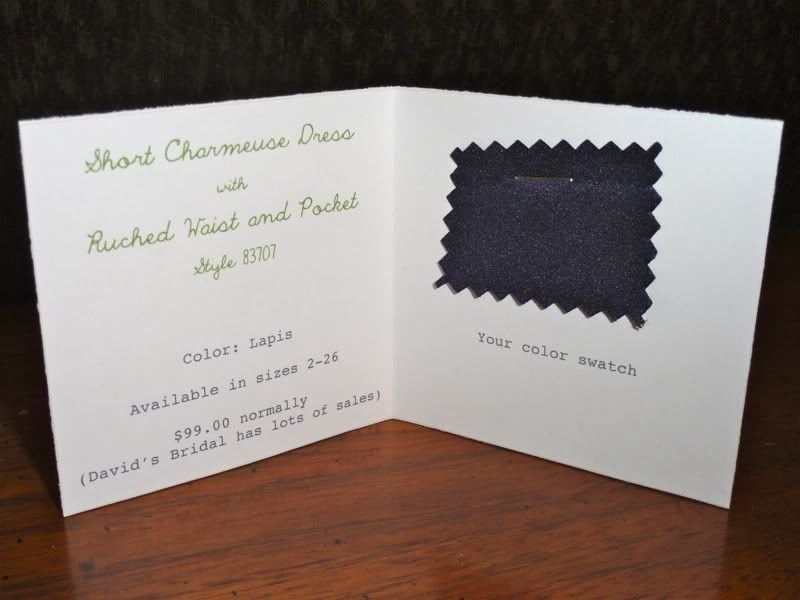
The last thing I made for this box was a little something I called the "Dress Shopping Cheat Sheet." It was a small folded card, about 2x2" that had all the information the girls needed to know about buying their dress. This way, when it came time for them to get their dresses, they could toss these in their purses and go worry free!
Inside, I also included the oldest picture I could find of me with each girl and put it in a magnetic frame so they could put them on their refrigerator and each girl's favorite candy! That way each box is super personal and wonderful.
In the end they looked like this:
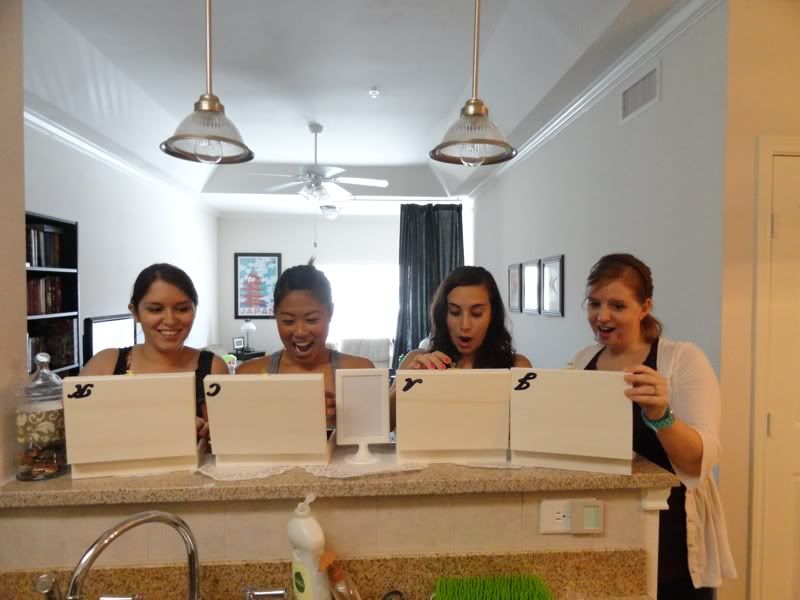
The girls had no idea that the ulterior motive for my tea party was to ask them to be my bridesmaids (except my maid of honor, on the left), so it was so fun to see their faces as they opened their boxes and discovered the surprise inside!
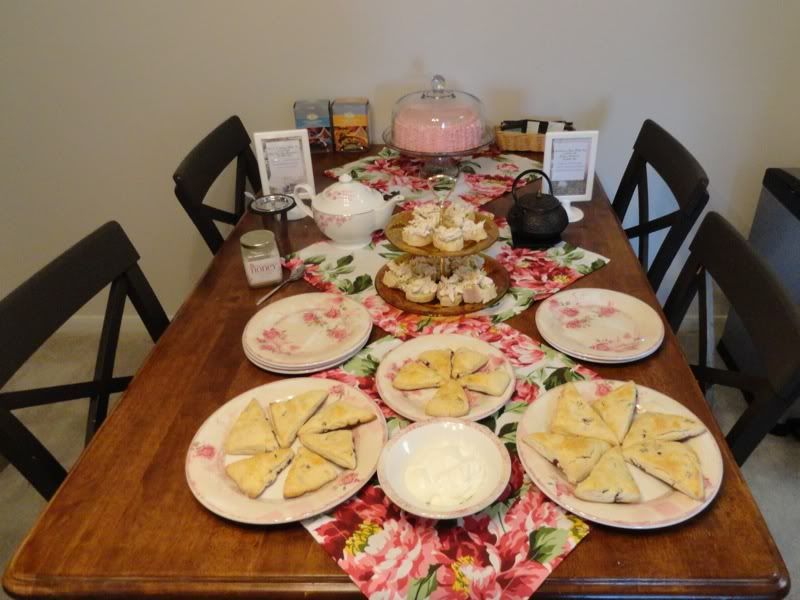
Instead of doing an ordinary table runner or table cloth, I bought 3 cloth napkins (clearance at Dillards) and angled them to create three distincts area. I also bought from 99 cent frames from IKEA and typed up a short description of the kind of tea in each teapot so that the girls could serve themselves without constantly asking "which tea is this?" The tea set and plates I used did not match. Nothing did REALLY. I wanted a little bit of an eclectic look. I used a common theme of pinks, greens, and some ambers. The tea tray I found at an antique mall in Denton, TX and the tea sets are from Teavana. The plates you see are Portmeirion Filigree Rose, and the the cake plate is Anchor Hocking (it doubles as a punch bowl). And guess what? You can find the tea set and the cake plate at the Amazon store, in the cooking section.
I made several wonderful foods that day, and we drank some divine tea. The spread was amazing. I was so proud. Orange-cranberry scones with homemade scone cream, chicken salad on baguette slices, and a yummy raspberry-filled butter cake. Recipes are to come soon! I didn't want to make this one entry too long, so be looking out for Tea Party, part 2! :)
No comments:
Post a Comment